


 20:09
20:09

in making a square using a sketch can be done by three methods, 1) using 2 points, 2) using three dots, three) from the center and then determine the next two points, in the following example I use two point method.
 after making a square give constraints on both, constraint serves to maintain the logic of a model according to the type of constraint is chosen, there are various types of constraint that can be selected, to launch a constraint, click the icon on the toolbar of the available constraints

then, select the appropriate constraints, in this example I use the parallel constraint, constraint-click way to make two parallel lines, then select the type of parallel constraint on the dialog box that is available, so the two lines that have been selected to apply the logic that the two lines are always parallel.many choices of constraints, ranging from fixed, all fixed, center, etc. use the appropriate type in accordance with the desired type of constraint, if still confused what kind of constraints that are suitable for use, UGS-NX5 provides automatic constraint, just click the icon automatic constraint, then the shape that has your design will be given an appropriate constraint by itself,

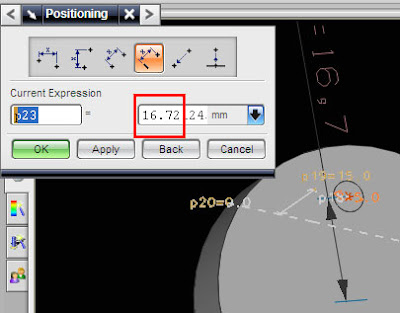
as evidence that the two lines you have chosen already in the constraint, I put value on one line, dimension by selecting the icon, then select create a dimension with a click of the tips of two lines, value listed not fix yet, click on the value and change dimensions, in example become 70, you will see another line that has been in parallel constraint will be changed to 70.


then, select the appropriate constraints, in this example I use the parallel constraint, constraint-click way to make two parallel lines, then select the type of parallel constraint on the dialog box that is available, so the two lines that have been selected to apply the logic that the two lines are always parallel.many choices of constraints, ranging from fixed, all fixed, center, etc. use the appropriate type in accordance with the desired type of constraint, if still confused what kind of constraints that are suitable for use, UGS-NX5 provides automatic constraint, just click the icon automatic constraint, then the shape that has your design will be given an appropriate constraint by itself,

as evidence that the two lines you have chosen already in the constraint, I put value on one line, dimension by selecting the icon, then select create a dimension with a click of the tips of two lines, value listed not fix yet, click on the value and change dimensions, in example become 70, you will see another line that has been in parallel constraint will be changed to 70.
