Get Unigraphics Tutorial from begining untul advance here
Please share this blog on your social network, it's make this blog keep a live and have more post,
leave some comment if you need further help
Showing posts with label make block. Show all posts

Saturday, 9 August 2008

making Block from Block, offset ediitng , Replace face

video tutorial below i make special for beginner, make block from block before or the datum reference is previous block, it's will help to design some part that use block or plate often, like mold / mould base, casting mold, injection mold and other's.

the basic step is like tutorial before, see at http://ugs-tutor.blogspot.com/2008/06/basic-block-using-two-point-and-height.html
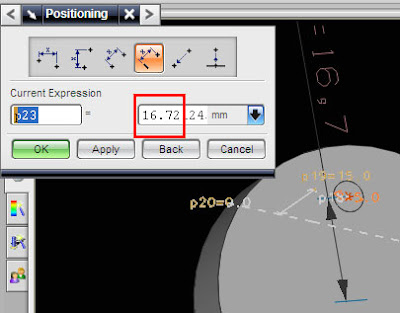
yes.. it's basically same, the different is point that we must selected, then the editing after we make the block.

see the video below

Online Videos by Veoh.com

Editing Process
below some editing that i use in those video
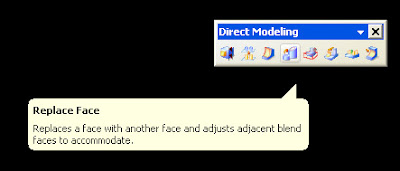
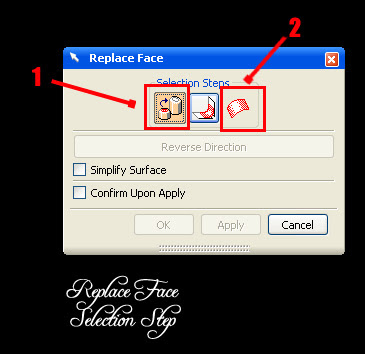
Replace Face
use this icon to activated replace face.


after you click those icon, the dialog box will appear, first selection, select the face that you want edit, second button selection is for reference face that you wanted. first face will same with the second face position.
it's fast way to edit face than we fill some value.


Offset Editing
to learn step by step to offset editing you can look at previous post
http://ugs-tutor.blogspot.com/search/label/offset


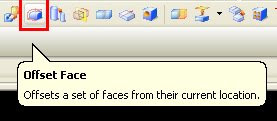
use the icon like picture below to activated offset operation

Friday, 27 June 2008

Basic block using two point and height specified

Basic tutorial to make 3D block using two point and height specified, step to make block are
1. click icon block


2. select two point and height,number two icon like picture below


3. Top view your screen
4. select two point at your screen
5. click OK

video tutorial also available below


Online Videos by Veoh.com

Wednesday, 18 June 2008

Begining Sketch Operation, Extrude

last month i post how to make block easier using Form Feature Operation, now let's learn make more attractive block using sketch in unigraphics NX5, sketch is basic feature in UGS that we can make block, cylinder, pipe and other 3D model from 2D model. so let's try make 3D model from 2D model.
Begin Sketch using Icon
to begin sketch click the sketch icon like picture below, it usually located at feature tool bar.


to see how to use sketch, to make block, try to play this video


after clicking the icon, next step is define the plane of sketch, default plane are X -Y plane, if we clicking OK to the default value, we will make sketch plane on X - Y Plane. as see on picture below, we can choose sketch plane. direction of plane, plane option and reference. at this tutorial we use X-Y default plane.


after click OK, Sketch plane will available, at those plane we can drawing using 2D model type like line, arc, profile, circle. try using profile to make like continues line connection.

we can choose preferred snap point option, when we choose profile we also can choose basic shape, line or arc.

begin to sketch with 0,0 coordinate, click the 0,0 then bring it horizontal click other position and the closed line connection like picture below.


then after make closed connection line, right click your mouse choose OK.


EXTRUDE OPERATION

we can make 3D model using extrude operation from 2D model like sketch or line, to begin extrude operation click the extrude icon


dialog box will appear, fill the end distance value 25, then click to 2D sketch line, click OK.


3D model from extrude and sketch will appear like picture below

Saturday, 24 May 2008

Make block solid body, using icon form feature

Actually we can make a block in various way using Unigraphic by using sketch, icon, and extrude, at this tutorial we make using icon from feature. follow step by step tutorial below
1. first choose block icon from feature.

2. dialog box will appear, there are three type method that we can chose , from left: one point, two point and diagonal point. chose one point

when you choose one point, enter the value of X,Y,Z, fill those text box with , X=80,Y=80 and Z=100.

3. click oke or click MB2 in your mouse (MB2 is scroll button) or click OK button. a block will appear in your screen, (click Ctrl+F2) to fit with screen.

Congratulation you have block like picture above.
What we do when we need to change the dimension ?
just click twice on the block, edit parameter dialog box will appear, we can edit the dimension by clicking feature dialog or by clicking the dimension that appear in the block. now let's change the z dimension from 100 to 20, click the Z dimension that appear, then change the value with 20 in dialog box, click OK, then OK again.
Step1

step2

your block dimension will change

 
Design by Free WordPress Themes | - Premium Blogger Themes |