Get Unigraphics Tutorial from begining untul advance here
Please share this blog on your social network, it's make this blog keep a live and have more post,
leave some comment if you need further help

Sunday, 31 August 2008

layer setting operation, statics wire frame view mode

tutorial below is simple way to view your object in wire frame, so we can choose some view mode in unigraphics like solid body, sheet body,statics wire frame, shaded view and others

Online Videos by Veoh.com

then after learning view mode, we can learn how to manage object using layer setting. at the sample video above is mold construction 3D model plate with basic bolts, then i want to hidden the bolts in other layer, so we need to manage an object in different layer. basically default setting working layer is always layer 1.

step to move object in different layer are
1. click the move to layer setting icon.
2. click the object that want to move to others layer
3. layer dialog window will appear select the layer number or just type the number that you want.
4. select OK

maximum layer number in unigraphics is 256
look at video above to learn more

With NX5, you can control whether objects are visible or selectable by using layers. A layer is a system-defined attribute that all objects in NX5 must have, such as color, font, and width. by organizing object in layer it will make rendering object more faster, and easy to manage for example when work with large and huge model,all bolts is in one layer, pipe in other layer and so on. There are 256 usable layers in NX5, one of which is always the Work Layer. Any of the 256 layers can be assigned to one of four classifications of status:
• Work
• Selectable
• Visible Only
• Invisible
The Work Layer is the layer that objects are created ON, as i told before when we not set the working layer, we always work in default layer number 1.and is always visible and selectable while it remains the Work Layer. When the Work Layer is changed to another layer, the previous Work Layer automatically becomes Selectable and can then be assigned a status of Visible Only or Invisible.
The number of objects that can be on one layer is not limited but more object in one layer it's make loading and rendering object more slow, so manage using layer is important when we working with large, detail and a lot of object. You have the freedom to choose whichever layer you want to create the object on and the status of that layer.

Saturday, 16 August 2008

Split a block, Using Split Body Command

In Unigraphics from NX1 until NX5, Split Body command always available, this command is easy to use, easy to split a block, body or part that we make before, there are various parameters that we can use to split body, for example using circle, plane, face, two line, two line with length on circle, UCS and Axis and others.

embed video below is shown step to step split a block become two block, i post the video in veoh, some times it's need long time to load this video, just be patient

Online Videos by Veoh.com


use icon like picture below to begin split body command.

Be careful

why becouse split body command will remove all parameters from body or part after we split, so we can not edit those body again using editing parameters.

use point and distance then click the plane

Saturday, 9 August 2008

making Block from Block, offset ediitng , Replace face

video tutorial below i make special for beginner, make block from block before or the datum reference is previous block, it's will help to design some part that use block or plate often, like mold / mould base, casting mold, injection mold and other's.

the basic step is like tutorial before, see at http://ugs-tutor.blogspot.com/2008/06/basic-block-using-two-point-and-height.html
yes.. it's basically same, the different is point that we must selected, then the editing after we make the block.

see the video below

Online Videos by Veoh.com

Editing Process
below some editing that i use in those video

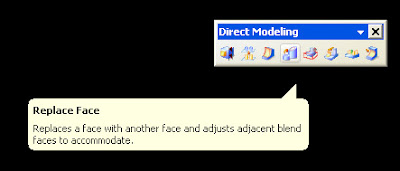
Replace Face
use this icon to activated replace face.


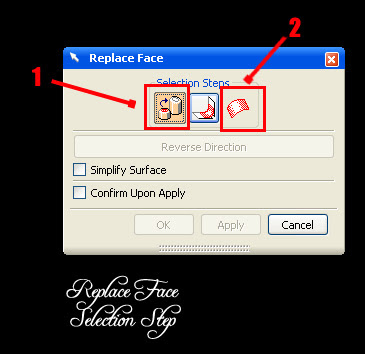
after you click those icon, the dialog box will appear, first selection, select the face that you want edit, second button selection is for reference face that you wanted. first face will same with the second face position.
it's fast way to edit face than we fill some value.


Offset Editing
to learn step by step to offset editing you can look at previous post
http://ugs-tutor.blogspot.com/search/label/offset


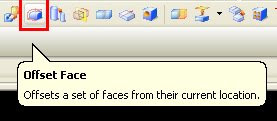
use the icon like picture below to activated offset operation

Tuesday, 5 August 2008

Transparent the object,offset same region, move together in Unigraphics (UGS NX)

at this post below we can learn how to make objects become transparent so we can look the inside of those object, than how to move together a face using offset region.

Transparent an Object
it's cool and sometimes important to make an object become transparent, becouse sometimes we need to look the object in inside the other object more detail.
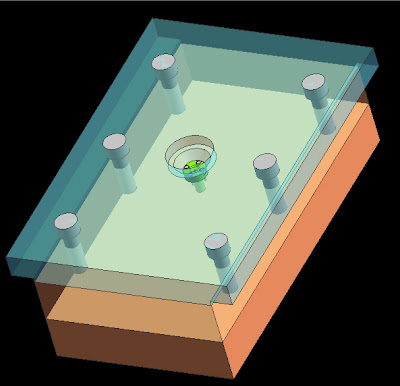
picture below shown an object with transparent view.


at those sample picture we can see the inside of same object using transparent.
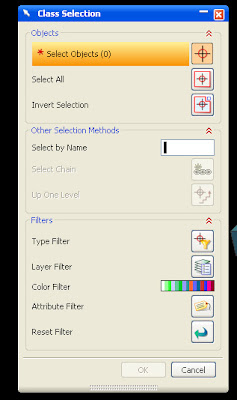
tho make object transparent, you can click object display icon, or by short cut CTLR+J, after that the class selection window will appear


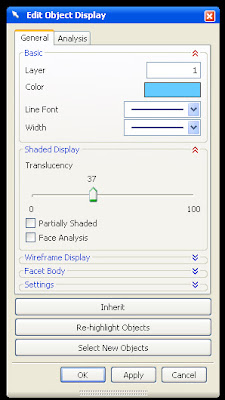
click the object or part, then click OK, or press center button of your mouse. then change the translucency value more than 0,


then click APPLY or OK
or see the complete video tutorial below

Online Videos by Veoh.com

at those video you can also learn how to move face together more than one object or parts. it's simple, just use offset icon then select together the face that want to move, enter the value then click OK.

 
Design by Free WordPress Themes | - Premium Blogger Themes |