Get Unigraphics Tutorial from begining untul advance here
Please share this blog on your social network, it's make this blog keep a live and have more post,
leave some comment if you need further help

Tuesday, 17 June 2008

Make simple Bolt


at the post, we will learn to make simple bolt using Unigraphics NX5 software.
step to make simple bolt are
1. make cylinder for bolt body
2. make cylinder for bolt head
3. unite those two cylinder
4. give chamfer operation at bottom and top of bolt

you also can see those step by see this video


Cylinder
to begin make cylinder, choose the icon like picture below


at the cylinder dialog box, fill the height and diameter, then click OK, basically if we don't define datum of the cylinder it will make from 0.0.0 datum.


from the cylinder that was created, make one more cylinder for bolt head, at this example we use ISO Standard Bolt, with diameter body 4 mm, height body 8mm, head high 4mm, and diameter 7mm.
to make second cylinder, after fill the diameter and height, before click OK, select face of first cylinder, choose face will became datum of second cylinder. to make easier select use inferred point.


Chamfer

to make chamfer select chamfer icon, then click the edge at head bolt and bottom bolt like picture above

Sunday, 8 June 2008

UNDERSTANDING THE FUNCTIONS OF THE MOUSE BUTTONS

when we design in UGS, 80 % work using mouse, so learning the function of mouse button is basic to work more faster in Unigraphic environments, basically mouse button in UGS divide in three button :
1. MB1 is left button
2. MB2 is scroll button or center button of mouse.
3. MB3 is right button.


The efficient use of these three buttons, along with the CTRL key, can reduce
the time required to complete the design task. The different combinations of the CTRL key and the mouse buttons are listed below:

1. The left mouse button is used to make a selection by simply selecting a face, surface, sketch, solid object or an object from the geometry area or from the Part Navigator. and we can select multiple entities with the this left button (MB1)
2. The right mouse button is used to invoke the shortcut menu, which has different options such as Zoom, Fit, Rotate, Pan, Delete abject,Hide parent, edit parameters, surpress and so on.
3. MB1 + MB2 + Drag, with this key, we can zoom the object.
4. MB2 + Drag, this key is to rotate function, Press and hold the middle mouse
button to invoke the Rotate tool
5. MB2 wheel scroll, is to zoom in and zoom out the object.Press and hold the CTRL key and then the middle mouse button to invoke the Zoom tool.
6. MB2 + MB3 + Drag, Press and hold the middle and the right mouse buttons to invoke the Pan tool, the Pan tool by first pressing
and holding the SHIFT key and then the middle mouse button

Saturday, 7 June 2008

Edit Object Display Change Color

Some times we need to change the color of part, to change the color first click Edit Object Display Icon, or click CTLR + J in your keybord


like picture above, then click your part solid body (1) click color label (2) and pick your color that you want (3)

you can also choose various color by clicking more color button at number 3, then the color window will appear (see picture below), then click OK button. your part color will change.

Edit blend radius via editing parameter

after we make blend operation, some times we need to change the radius of the blend that we have done, before we remove all parameter in that part we can use editing parameter to edit radius value.
see the video below


Begin editing parameter
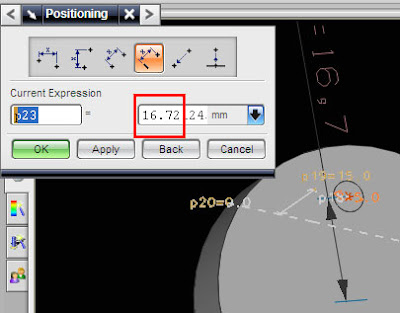
1. look at your part, to begin with editing parameter is click the blend then right click your mouse, or over your mouse until the face highlighted then right click on your mouse. (look at picture below )


2. choose edit parameter, we can edit thee value in two way, from flowing text box and edit parameter window, edit the value then click ok


3. the diameter will change

Friday, 6 June 2008

Unite Operation In Unigraphics

It's easy to unite together between two part or more in UGS, see the video below


Begin Unite Operation
1. click the unite icon, see picture below

2. Unite operation window will appear like picture below


at the bottom we can choose in checked box, keep target or and keep tool,
if we checked keep target the target part will not lost after unite operation, so you will have two part, unite result part and target part.
same condition if we chose keep tool, the tool target will not lost after unite operation, when we checked all, we will have three part,one from unite result part and two part from tool part and target part.

3. select the tool (solid body) then select the target (solid body)
click apply if you want execute the operation and still continue unite operation, click OK button to execute unite operation with close unite windows oepration.

Thursday, 5 June 2008

Coordinate Systems in UGS NX5

Coordinate system is basic and important to understanding before learn more about using Unigraphics, basically there are two type coordinate system in UGS NX5 :
1.Absolute Coordinate System (ABS) The inertial coordinate system which has its origin on the axis of the Unigraphics and is fixed with respect to the other object.
2. The Work Coordinate System (WCS)is what you will use for construction
when you want to determine orientations and angles of features, the Work Coordinate System (WCS) is used to facilitate geometry construction in different orientations. The WCS can be located and oriented manually anywhere in model space.

Note
All NX coordinate systems are right-hand, Cartesian coordinate systems,
made up of a set of X, Y, and Z axes, 90° apart from each other.


The location and/or orientation of the WCS will need to be considered when
using the following functions:
• Creatinga Primitive Feature (specifically a Block)
• Defining a plane when creating a Sketch
• Creating a Fixed Datum Plane or Fixed Datum Axis
• CreatingaRectangular Instance Array

Existing Coordinate Systems (CSIS)

To return to a specific location and orientation in modeling space, we can use this coordinate system.

Coordinate system Utility ICON

below is list of coordinate system command icon, we will explain in other post

Saturday, 31 May 2008

Edge Blend Operation In UG


blend is operation that make edge with radius, for modeling operation it will use very often. look at picture below, we will make some edge blend operation at the edge


to begin blend operation click edge blend icon, for menu click insert, detail feature and choose edge blend (see piture below)


after click the edge blend icon, at the edge blend window fill the radius that you want, for example i fill with 1.


then click the edge that you want, click apply, if you finish the operation click OK, or you can continue by fill other blend radius, then click other edge.

watch the video at the top for more learning make edge blend
picture below shown the result of edge blend operation

 
Design by Free WordPress Themes | - Premium Blogger Themes |